VSCM Collaboration III: Pistachio Prototyping... and Problems

So, since the last blog post, our concept has remained pretty much the same and things are going... fairly smoothly (with a just a few... minor? bumps along the way...)
We're still sticking to our group's agreed on concept of a product that helps solve the issue and annoyance of eating pistachios- which has taken the form of a two-in-one pistachio on-the-go container and opener/nut cracker.
 |
| (Final concept sketch by Noémie - VSCM) |
 |
| (Another final concept sketch by Noémie - VSCM) |
We decided that it would be easiest to digitally fabricate the outer 'shell' components and the middle divider, while the hinge and the nut cracking device (which will be a part of a tiny screwdriver) would be our components bought at Home Depot.
 |
| (Different versions of the proposed logos) |
In breaking down the workload, it was decided that the VSCM would do more work on the logo (which needed a name change as the old name of "Stash" apparently reminded some people of a place to stash drugs...) and further product development, while Kelsey and I would model the product digitally. As both Kelsey and I felt more comfortable working quickly in Rhino, both of us did our preliminary modelling in a more familiar software (which... I realize... goes against one of the points of this assignment- to become more comfortable with Fusion 360... but things happen when you're trying to model things at 3 am the night before you're scheduled to print... heh...) with the intentions of later uploading these to Fusion 360 to finish up and create the final assembly.
It was decided that Kelsey would reverse engineer the hinge, allowing us to scale the rest of the model to the size of the store bought component (a 1" hinge from Home Depot), while I would work on the shell pieces.
 |
| (Preliminary model in Rhino) |
 |
| (Preliminary model in Rhino.... the scale of the shell to the hinge is a little off...) |
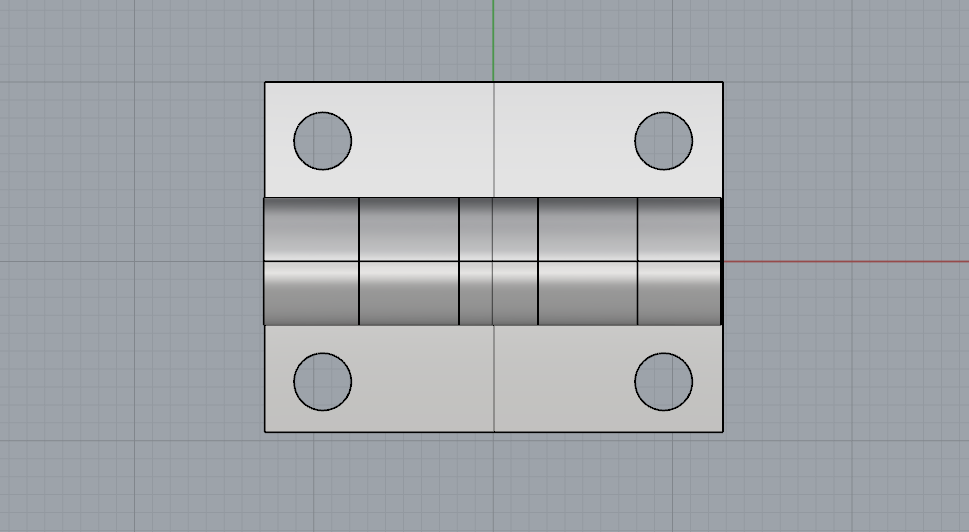

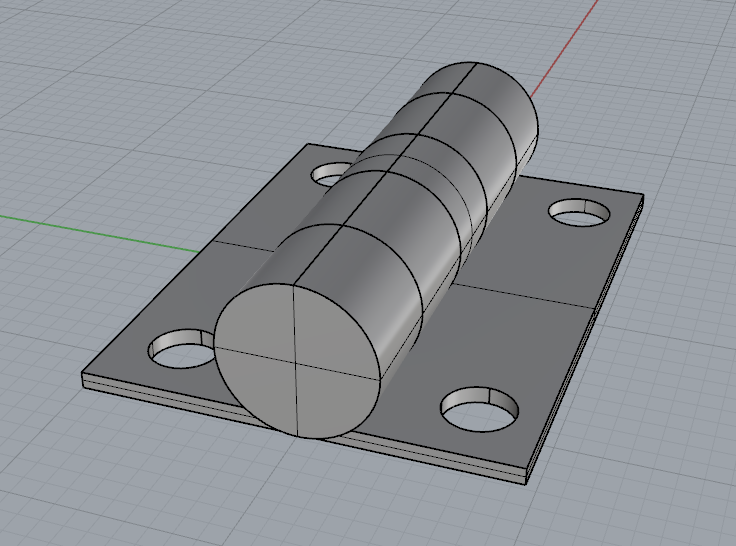 |
| (Reverse engineered hinge by Kelsey) |
....Which turned out to.... not be the best idea... heh...
What had happened:
Kelsey and I came in on Tuesday with the intentions to print the crap out of this thing, though we had some issues with the thicknesses of the walls of our model- they were far too thick to be economically printed (or... printed in a thickness that was at all reasonable) and a couple parts were overlooked in the model and would have no support when printed.
 |
| (Thanks to Kelsey for the visual explanation of our... multiple woeful errors) |
This led us to quickly add some removable support to certain parts of the model and further to the more... fun... part of fixing the model: Thinning down the walls of the model to a reasonable thickness.
Thinning down the walls of the model... this wasn't the easiest task because of the general egg-like shape of the shell components, the interference caused the interlocking mechanism that keeps the shell container together, and the fact that this had been modeled in Rhino... and had no easily modifiable step-by-step history... like it would have had.... if we [I] had modeled it in Fusion.... whoops...
After attempting to fix the original model in Rhino (great idea, right?) and not getting anywhere very quickly, we decided to reach out to others more... experienced than ourselves (aka, asking Eddie, who had just then walked into the Thing Tank).
 |
| (The updated, thinned down version of the model now in Fusion 360) |
.......4 hours or so later.....
...We got the model fixed, after a tremendous amount of help from Eddie (who essentially rebuilt the model in Fusion 360 after deciding that it would be easier than modifying the Rhino model that had been uploaded to Fusion).
 |
| (....Slick....) |
It was an awesome learning experience for all of us between Kelsey and I getting the chance to watch someone who knew what they were doing in Fusion work and problem solve and Eddie claiming that the process allowed him to test new functions in Fusion.... (a little debatable in my opinion... in light of him coming up to look for a screw, then getting roped into essentially helping us rebuild nearly our entire project)*.
 |
| (Tah-dah, a shiny, new, blue, pistachio shelling shell) |
Well, after that struggle, we were finally able to get one part of the product printed, with additional guidance from Bryan as to the support structures that had to be added to some parts of the model*.
We had been hoping to get all three components printed so we could focus on the assembly of the product, but after all the time it took to problem-solve and modify the digital model, we were only able to get one component printed (which is still completely fine!).
The other components will be printed over the weekend by Kelsey (barring any other problems with the model... heh...), and the final assembly will occur sometime next week (aka.... screwing on a hinge... and epoxying in a bit of screwdriver).
But so far... pretty good. Our group seems to be working smoothly together, with everyone pulling their weight and things getting done and done fairly well (except for my modelling, but whoops...)
*Serious, multiple thank you's to both Bryan and Eddie for all your help with all these things
(Seriously, a thousand thank you's to the both of you...)
(...Seriously though...)

Comments
Post a Comment